Do you want to add autocomplete for address fields in WordPress?
Recently, one of our users asked us how to add autocomplete for address fields in WordPress forms. Autocomplete allows users to quickly select addresses from suggestions generated in real-time as they type.
In this article, we will show you how to add autocomplete for address fields in WordPress using Google Places API.
Why Add Autocomplete Address Fields in WordPress
Adding autocomplete address fields in WordPress can help you to improve the user experience on your website.
For example, if you own an ecommerce store, your customers will be able to enter their addresses faster and avoid typos.
When shoppers type in their address, the possible addresses will show up on their screen based on their current location, so all they need to do is pick the correct one. This helps you reduce errors since the options that are shown to the user are connected with Google Places and Google Maps API.
Autocompletion in address fields is one of the most convenient functionalities you can provide to your users. If you can quickly help buyers through checkout, they are more likely to go through with a purchase.
By making each purchase fast and simple, you’re more likely to boost your sales and turn the occasional shopper into a recurring customer.
Now that you understand the benefits of adding autocomplete address fields in WordPress, we’ll show you how to do it step by step.
Video Tutorial
If you don’t like the video or need more instructions, then continue reading.
The first thing you need to do is install and activate the Autocomplete Google Address plugin.
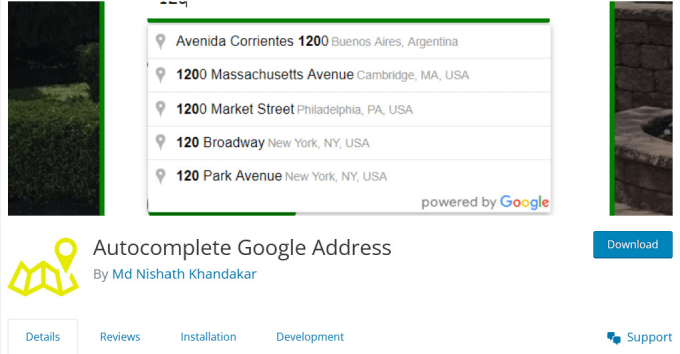
For more details, see our step by step guide on how to install a WordPress plugin.
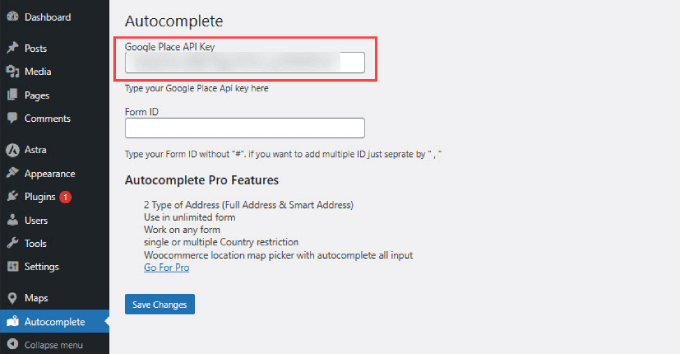
Upon activation, you need to visit the Settings » Autocomplete page in your WordPress dashboard to configure plugin settings.
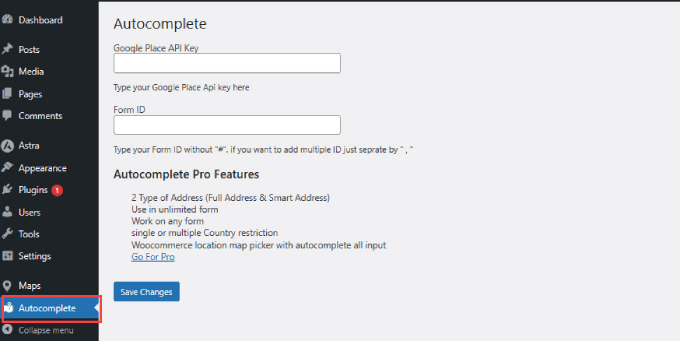
You will be asked to enter the Google Places API Key. This API key allows your website to connect with Google Maps and retrieve autocomplete suggestions from their database in real-time.
Access Google Places API Key
Head over to the Google Developer Console website and create a new project.
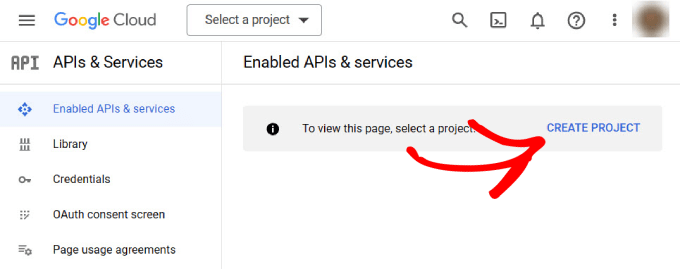
You’ll be brought to a new page asking you to provide a name for your project.
Use a name that will help you later identify the project, and then click on the ‘Create’ button. If you have an organization that you want to connect to, you can hit the ‘Browse’ link to see a dropdown of options.
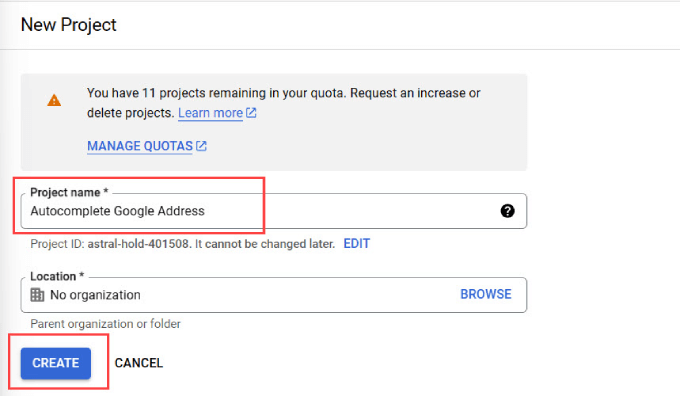
Wait for a few seconds, and you will be automatically redirected to the APIs & Services page.
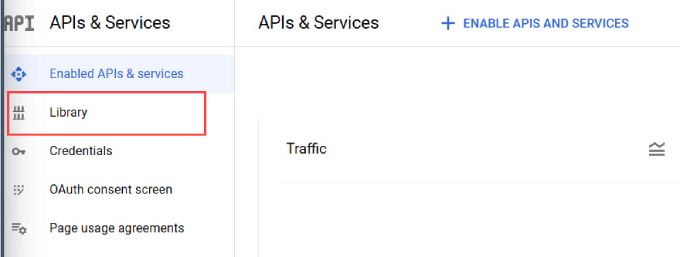
From here, you want to navigate to the left side panel and click on the ‘Library’ tab.
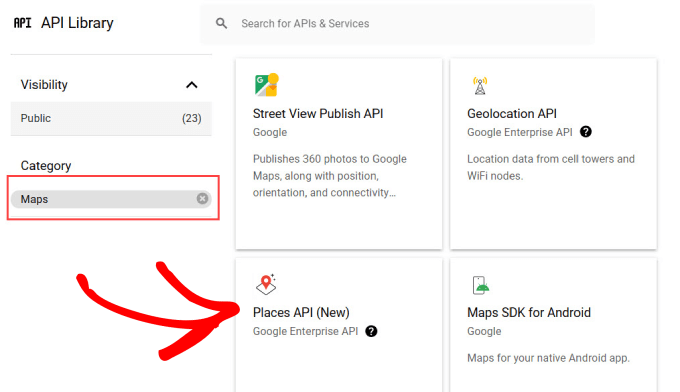
Now, you will see the list of popular Google APIs that you can enable for your project. In the left panel, select ‘Maps’ to filter by options only related to maps.
You’ll need to just find and click on the ‘Places API’ option.
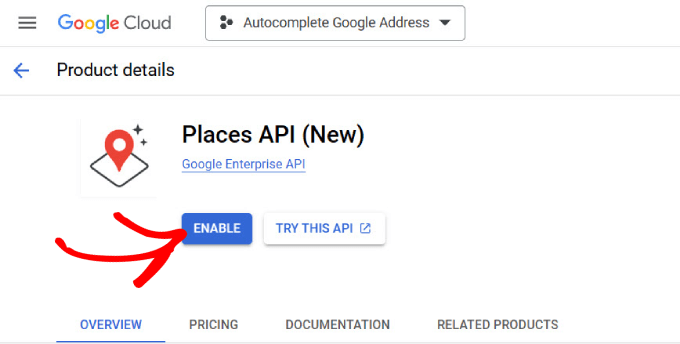
From there, you’ll be directed to the overview page of the Places API.
Simply click the ‘Enable’ button to authorize the API.
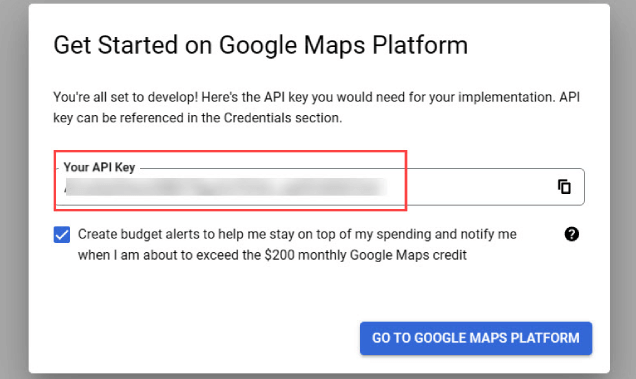
If your Google Console is set up correctly, you should see a pop-up window appear with your API Key.
However, if this is your first time setting up your Google Console account, you may have to enter your billing information.
Now, you can head back over to your WordPress site.
Paste the API key from your Google Console to where it says ‘Google Place API Key.’
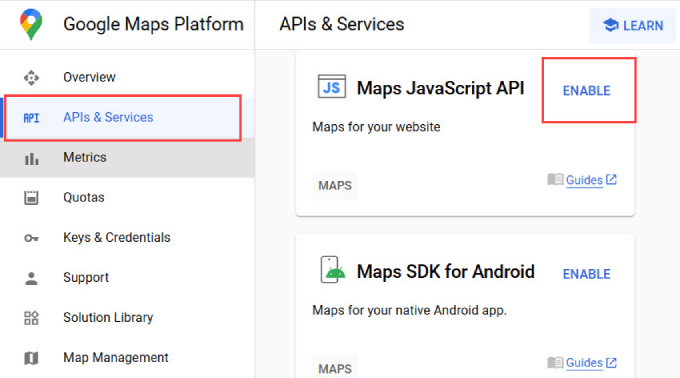
To make sure that the autocomplete address works in WordPress, you’ll need to enable the Google Maps JavaScript API.
So, all you have to do is go back to the ‘APIs & Services’ tab from the Google Developer Console dashboard. Then, find the ‘Maps JavaScript API’ and click ‘Enable.’
Now, you’re ready to move on to adding the form ID.
For the next step, you’ll need the form ID of the address field where you want to add the autocomplete address feature.
Enabling Autocomplete Address in WordPress Form Fields
You can add an autocomplete address feature to any form field created by any WordPress form builder plugin.
We will be using WPForms in this tutorial since it’s the best drag and drop form builder and the easiest to use for beginners. However, these instructions will work no matter what contact form plugin you are using.
First, you need to create a form that has an address field or a set of address fields.
Once you are done, add this form to your WordPress website like you would normally do.
Next, go to the post or page where you added your form. You need to right-click the address field and select ‘Inspect’ from the browser menu.
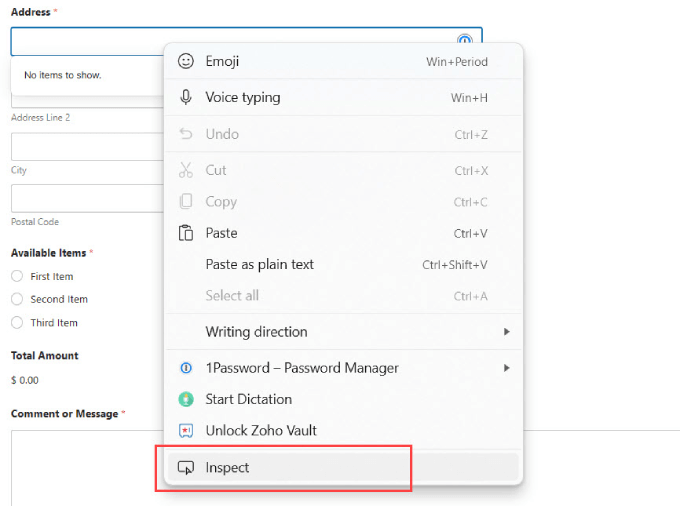
Here, you’ll see a highlighted section with the form ID value for the input field.
For example, in this screenshot, our form’s ID value is wpforms-567-field_4.
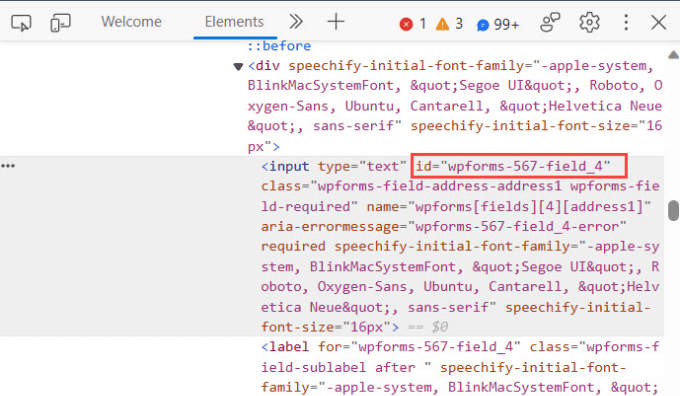
You need to copy this value and paste it into the plugin settings page.
However, you’ll want to add the autocomplete feature to your entire address form. For example, if you had wanted users to be able to autofill an entire shipping address, that means they’ll need to autofill the city, start, and postal code.
In this case, you would need to follow the same process by clicking ‘Inspect’ and then finding the form ID for each field.
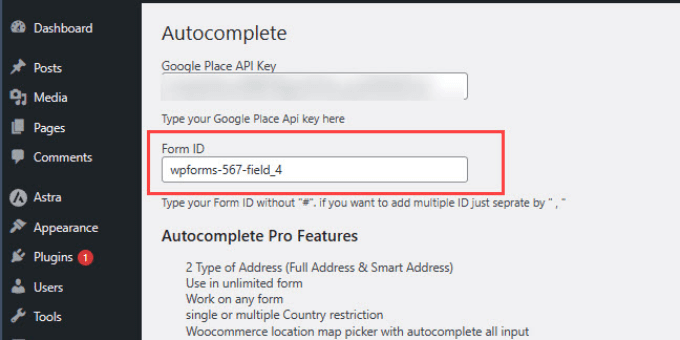
Once you’ve got all of your IDs, copy it into the Autocomplete page, where it says ‘Form ID.’
When adding multiple IDs, you’ll need to separate each ID with a comma with quotations, as shown below. Once you’re done, don’t forget to hit ‘Save Changes.’
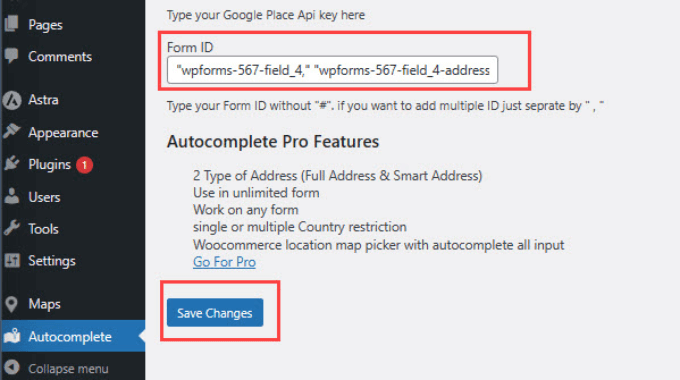
That’s all; you can now visit your form page and try entering an address.
The form field will automatically start showing suggestions using Google Places and Google Maps.
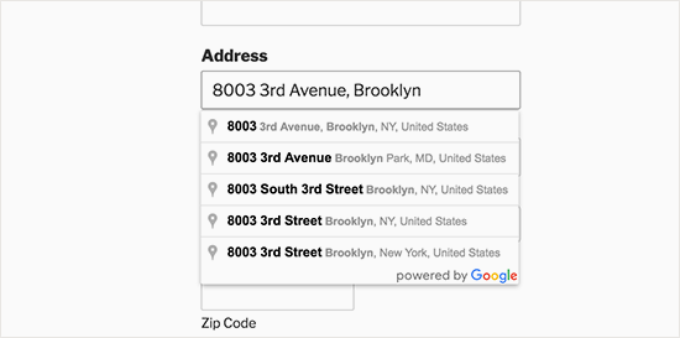
Now, you’ve successfully added the Google address autocomplete feature to your forms. Users will be able to autofill your form, whether they are checking out from your WooCommerce store or completing a user registration signup.
We hope this article helped you learn how to add autocomplete for address fields in WordPress. You may also want to see our list of 24 must-have WordPress plugins for business websites or our guide on how to create an email newsletter.
If you liked this article, then please subscribe to our YouTube Channel for WordPress video tutorials. You can also find us on Twitter and Facebook.

